
Every WordPress site eventually ends up with the same hidden problem: a media library packed with images nobody is using. Old hero shots from a redesign, duplicate product photos, screenshots uploaded “just in case” — they all sit on your server, bloating backups, slowing migrations, and quietly costing you storage money.
In this guide, you’ll learn how to find unused images in WordPress, separate them from the ones that are actually in use, and safely clean them up using the free Media Library Tools plugin.
Why Unused Images Are a Real Problem
Most WordPress sites carry 30%–60% of media files that are never displayed anywhere. This matters because:
- Backups take longer — every unused image is still copied, compressed, and stored.
- Hosting bills creep up — storage and bandwidth aren’t free.
- Migrations get painful — moving a 40 GB site is far worse than moving a 12 GB one.
- Site search and admin lists slow down — large
wp_postsandwp_postmetatables impact dashboard performance. - CDN costs grow — orphaned files still get synced to your CDN origin.
The catch? WordPress doesn’t tell you which images are used and which aren’t. There’s no built-in “Unused” filter. That’s exactly the gap Media Library Tools fills with its Used Where feature.
What “Used” vs “Unused” Actually Means
Before deleting anything, you need a clear definition. An image is considered used if it is referenced in at least one of these places:
- Featured image of a post, page, or custom post type
- Inside post content (Gutenberg blocks, classic editor HTML, shortcodes)
- Page builder data (Elementor, Beaver Builder, WPBakery serialized data)
- Custom meta fields (ACF, CMB2, Meta Box, builder JSON blobs)
- WordPress options (theme settings, logo, favicon, widgets, customizer)
- WooCommerce product galleries and gallery shortcodes
- Frontend-rendered images detected at runtime (catches dynamic templates)
Anything that doesn’t appear in any of those locations is unused — a safe deletion candidate.
Media Library Tools scans all of these layers and stores results in a dedicated table (tsmlt_image_usage) so you can review, filter, and act on them without re-scanning every time.
Step 1: Install Media Library Tools (Free)
- Go to Plugins → Add New in your WordPress admin.
- Search for “Media Library Tools”.
- Click Install Now, then Activate.
- You’ll see a new Media Library Tools menu appear in the sidebar.
The plugin is free, lightweight, and works on PHP 7.4+ — no account, no API key, no email gate.
Step 2: Run the Used Where Scan
Open Media Library Tools → Used Where. You’ll see a single big button: Start Scan.
Click it. The plugin will:
- Loop through every attachment in your media library in batches (non-blocking, so your dashboard stays responsive).
- Check each one against posts, pages, custom post types, post meta, options, and serialized builder data.
- Optionally track frontend usage — actual
<img>tags rendered on real page loads (enable this in Settings → Track Frontend Usage for the most accurate results).
Large libraries (10,000+ images) may take several minutes. You can leave the tab open or come back later — progress is persisted.
Tip: Enable “Track Frontend Usage” for at least a week before deleting anything. Some images only appear via dynamic templates, AJAX, or conditional logic, and frontend tracking is what catches them.
Step 3: Review the Three Tabs
After scanning, the Used Where page splits results into three tabs:
🟢 Used
Every image that was found in at least one location. Each row shows where it’s used — post title, post type, and usage type (featured, content, meta, option, frontend). Click through to verify before assuming anything.
🔴 Unused
The interesting one. These attachments couldn’t be found anywhere. Sort by file size to find the biggest wins first — a single unused 4 MB hero image is worth more than fifty 20 KB icons.
🗑️ Trash
A safety net. Images you move to trash are switched to post_status='trash' (WordPress native trash) and hidden from the frontend via three protective hooks:
wp_get_attachment_urlreturns empty for trashed imageswp_get_attachment_image_srcreturns falsewp_get_attachment_imagereturns empty HTML
This means if you accidentally trash something that is used, it just disappears from view — it doesn’t break with a broken-image icon. You can restore it from the Trash tab with a single click.
Step 1: Install Media Library Tools (Free)
- Go to Plugins → Add New in your WordPress admin.
- Search for “Media Library Tools”.
- Click Install Now, then Activate.
- You’ll see a new Media Library Tools menu appear in the sidebar.
The plugin is free, lightweight, and works on PHP 7.4+ — no account, no API key, no email gate.
Step 2: Run the Used Where Scan
Open Media Library Tools → Used Where. You’ll see a single big button: Start Scan.
Click it. The plugin will:
- Loop through every attachment in your media library in batches (non-blocking, so your dashboard stays responsive).
- Check each one against posts, pages, custom post types, post meta, options, and serialized builder data.
- Optionally track frontend usage — actual
<img>tags rendered on real page loads (enable this in Settings → Track Frontend Usage for the most accurate results).
Large libraries (10,000+ images) may take several minutes. You can leave the tab open or come back later — progress is persisted.
Tip: Enable “Track Frontend Usage” for at least a week before deleting anything. Some images only appear via dynamic templates, AJAX, or conditional logic, and frontend tracking is what catches them.
Step 3: Review the Three Tabs
After scanning, the Used Where page splits results into three tabs:
🟢 Used
Every image that was found in at least one location. Each row shows where it’s used — post title, post type, and usage type (featured, content, meta, option, frontend). Click through to verify before assuming anything.
🔴 Unused
The interesting one. These attachments couldn’t be found anywhere. Sort by file size to find the biggest wins first — a single unused 4 MB hero image is worth more than fifty 20 KB icons.
🗑️ Trash
A safety net. Images you move to trash are switched to post_status='trash' (WordPress native trash) and hidden from the frontend via three protective hooks:
wp_get_attachment_urlreturns empty for trashed imageswp_get_attachment_image_srcreturns falsewp_get_attachment_imagereturns empty HTML
This means if you accidentally trash something that is used, it just disappears from view — it doesn’t break with a broken-image icon. You can restore it from the Trash tab with a single click.
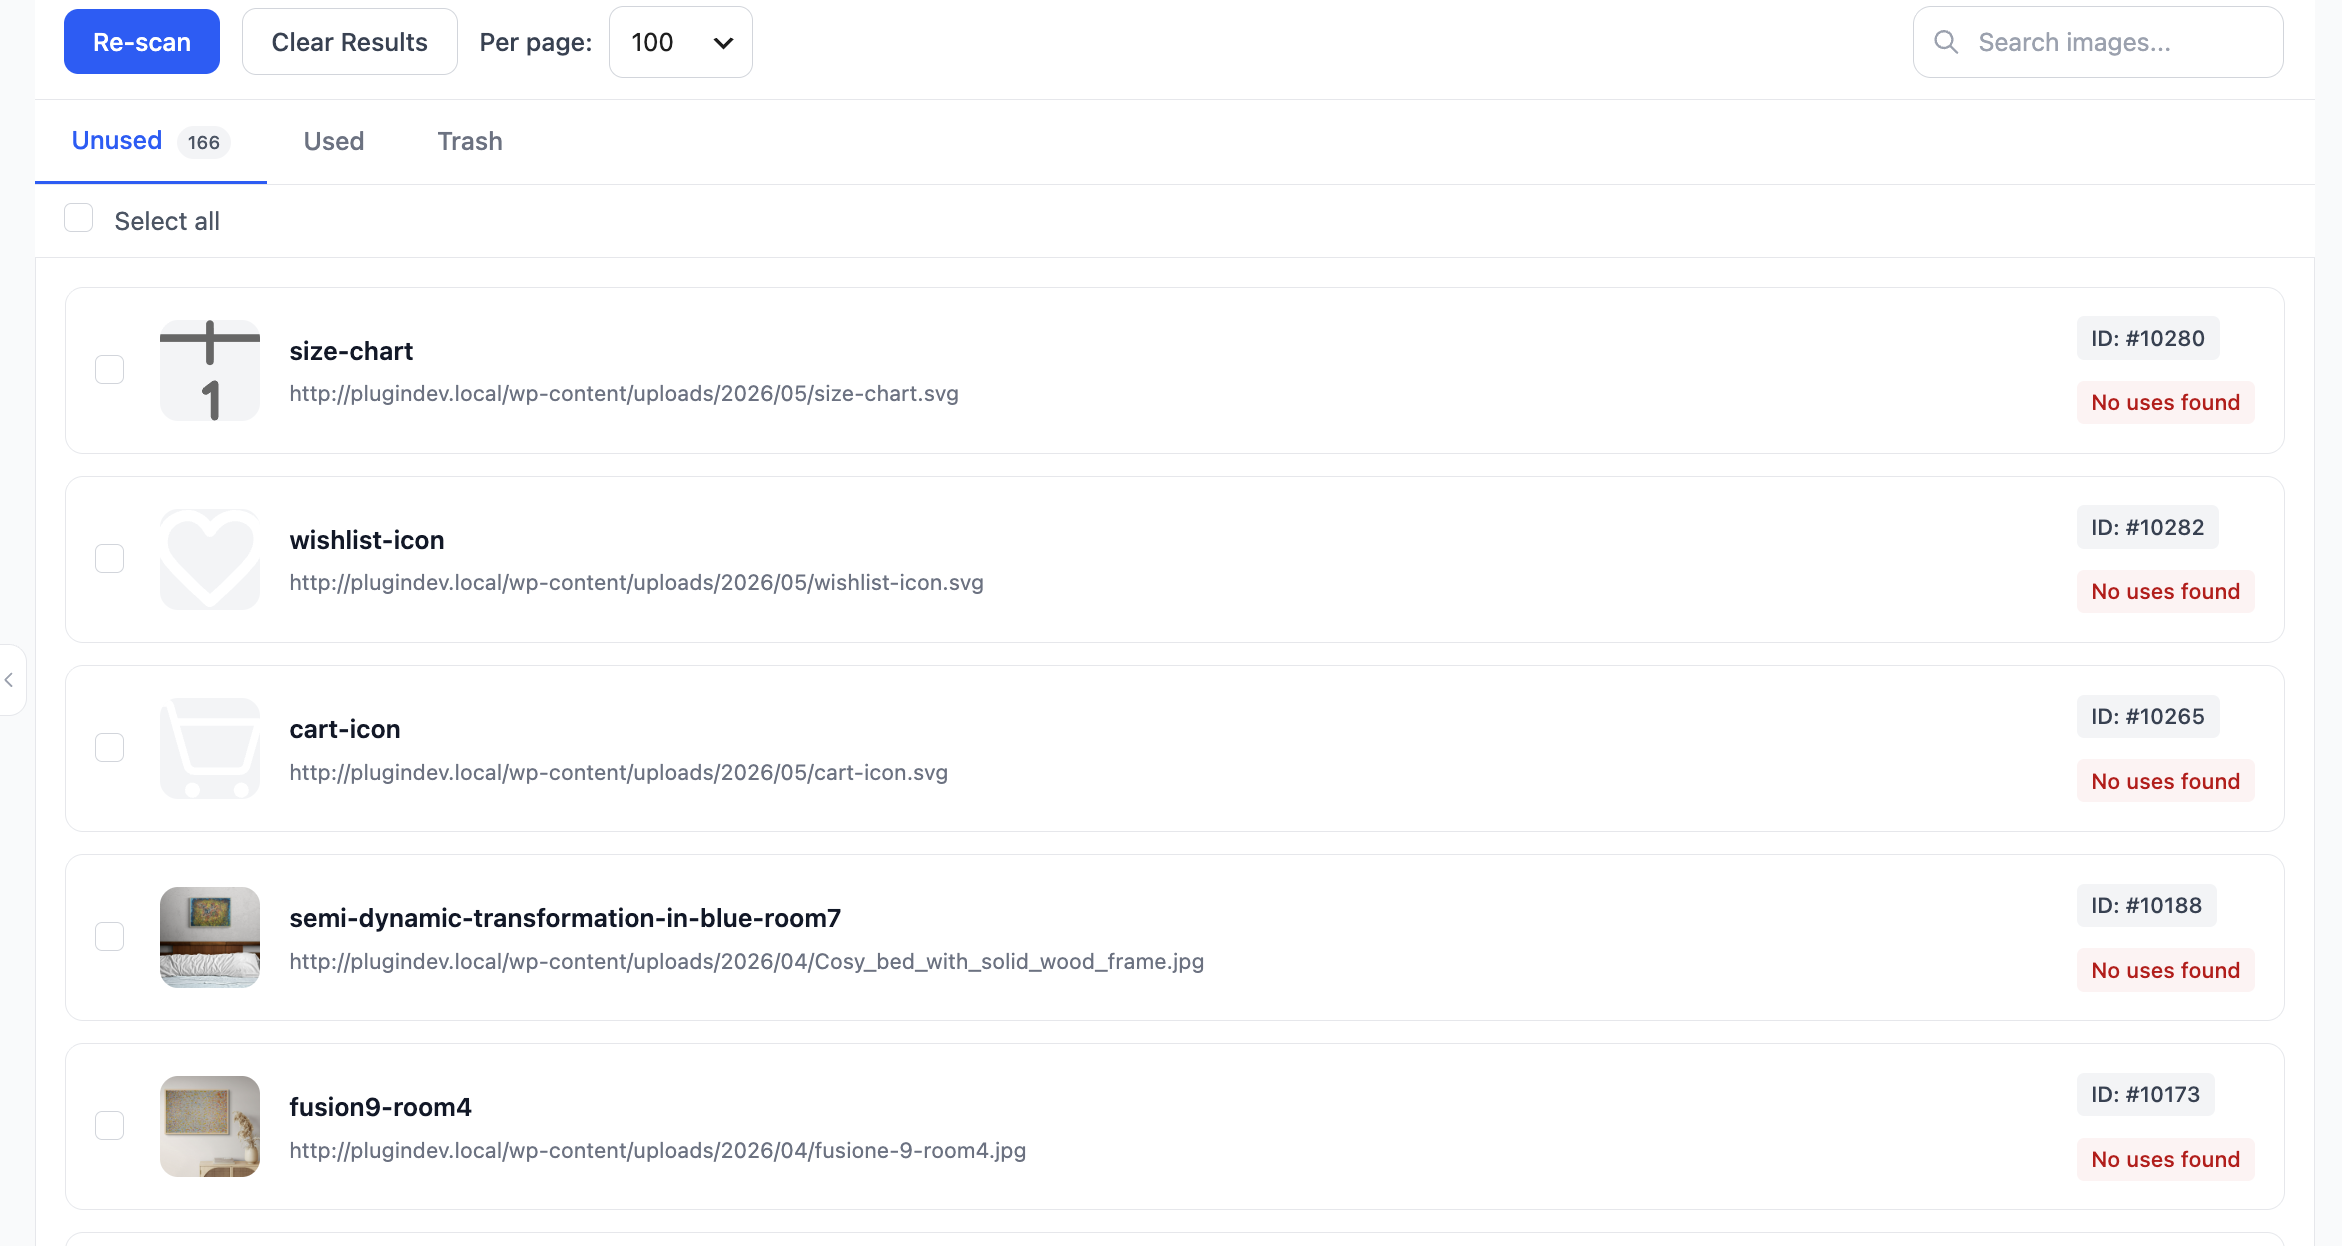
Step 4: Safely Delete Unused Images
The recommended workflow is trash first, delete later:
- From the Unused tab, select images you’re confident about.
- Click Move to Trash. They’re hidden from the frontend immediately.
- Wait 7–30 days. Browse your site. Check key landing pages. If anything looks broken, restore from Trash.
- Once you’re sure, open the Trash tab and click Delete Permanently. This calls
wp_delete_attachment($id, true)— files are removed from the server and the database.
This two-stage process is the single biggest difference between “cleaning up” and “breaking your site at 2 a.m.”
Step 5: Keep It Clean Going Forward
A one-time cleanup is good. A clean library by default is better. Combine Used Where with these companion features in the same plugin:
- Duplicate Detection — MD5-hash scan finds byte-identical duplicate uploads. Pro merges them automatically and updates references everywhere.
- Rubbish File Finder — scans the
/wp-content/uploads/folder for orphaned files (files on disk but not in the media library — common after failed imports or theme switches). - EXIF Data Tools — strip GPS and camera metadata on upload, see camera/date columns in the media list, and scan your library for files still leaking location data.
- Bulk Rename — give all images SEO-friendly filenames based on post title, alt text, or SKU (Pro).
Together they turn the media library from a swamp into something you actually trust.
Conclusion
If your WordPress site has been online for more than a year, you almost certainly have hundreds — maybe thousands — of unused images burning storage and slowing backups. You don’t have to live with it, and you don’t need a developer to fix it.
Install Media Library Tools, run a Used Where scan, trash the unused images, and reclaim the space. Most users free up between 20% and 50% of their uploads folder on the first pass. If need more feature then install Media Library Tools Pro
Your future self — the one running a backup, paying a hosting bill, or migrating to a new host — will thank you.
Question and Answer
Why do unused images in WordPress cause problems?
Unused images in WordPress slow down backups, increase hosting and CDN costs, complicate migrations, and impact dashboard performance by bloating your wp_posts and wp_postmeta tables.
How does the Media Library Tools plugin identify unused images?
Media Library Tools scans for references to each image in post content, featured images, page builder data, custom meta fields, WordPress options, WooCommerce galleries, and dynamically rendered frontend images. Images not found in any of these locations are considered unused.
What is the safest way to delete unused images in WordPress?
Move unused images to the Trash first using Media Library Tools. This hides them from the frontend without creating broken links. Wait 7–30 days to ensure nothing is broken, then permanently delete them if everything looks fine.
Will scanning or deleting images with Media Library Tools disrupt my live site?
No, the scan runs in 50-item AJAX batches with short delays and is performed in the background using wp_doing_ajax(), so visitors will not experience any disruption. Trashed images just become invisible, not broken.
Does Media Library Tools handle images used in page builders and multisite environments?
Yes, Media Library Tools scans serialized builder data from plugins like Elementor, WPBakery, and Divi, as well as custom meta fields and options. It also works with WordPress Multisite, with scans and results managed per individual site.
How is this different from other “media cleaner” plugins?
Three things: (1) it scans WP options (theme settings, widgets) which most plugins miss; (2) it can track frontend usage at runtime so it catches dynamic templates; (3) trashed images are suppressed on the frontend, so mistakes never result in broken-image icons.
